~


Friday, January 31, 2020

Week 5 of the 2020 Chicken Challenge: Vinegar Chicken with Crushed Olive Dressing, aka NYTimes Most Popular Recipe of 2019


I spent a lot of time the first couple days of 2020 digging through boxes looking for cookbooks and looking at a couple favorite websites and generally coming up with a list of what the first couple chicken dishes I would make for this challenge.  One thing that kept popping up online - the #1 for 2019 on the NY Times Cooking site was from Alison Roman for a Vinegar Chicken with Crushed Olive Dressing, so of course I was interested in making it.

I don't actually subscribe to the NY Times online, but a quick search found the recipe elsewhere online in several places, including here.

The recipe is a simple roasted chicken seasoned with turmeric, and using the chicken drippings to make a vinaigrette with olives and herbs.  Very simple but it sounded like a great week night option.

I cross referenced Alison Roman's book, "Dining In" because the NYTimes recipe sounded similar to one in there:  "Skillet Chicken with Crushed Olives and Sumac".  The cooking method was a little different,  but the same concept - cook chicken, add acid (lemon juice in the case of the book), finish with herbs and crushed olives.   The book version of the recipe is also here.

I went back and forth about which version I wanted to do and ended up doing the NY Times version, but I will also go back and do the Dining In version as a bonus recipe in the near future to compare the two versions.

So this recipe does have a few items I didn't have in my pantry, specifically turmeric and Castelvetrano olives.    Castelvetrano olives are a new one for me - apparently they are hugely popular in Italy - they are a mild, buttery brilliant green olive.   I actually prefer black olives to green olives, and I had a back up plan if I couldn't find these.     However, no issues there - my local grocery store had them.  

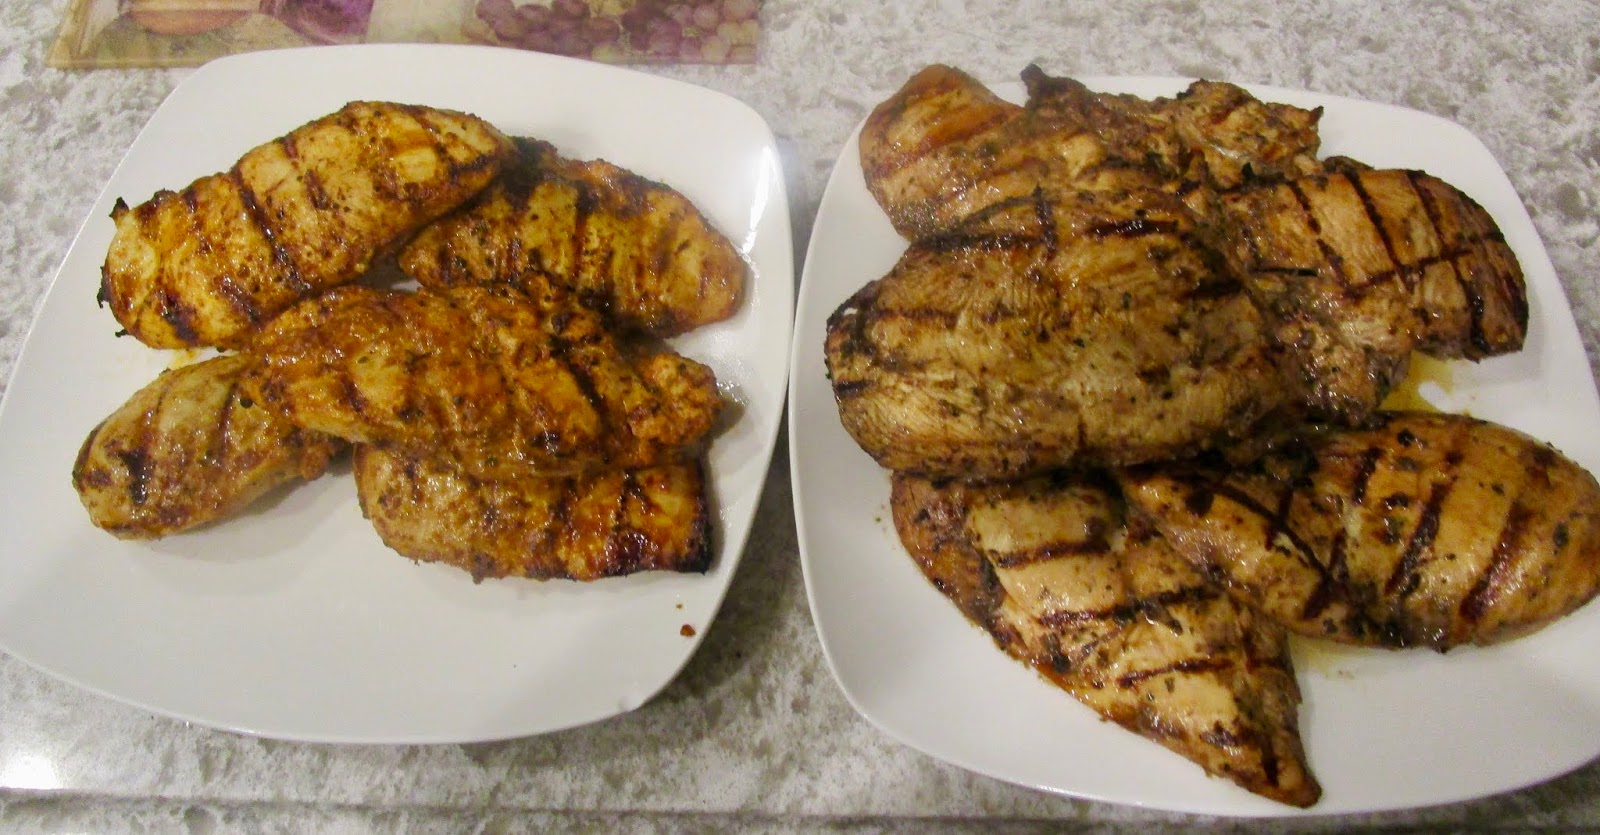
I went with my go-to option for bone in chicken, which is a combination of legs and thighs.    The ones I got were particularly hefty, so I just used 2 legs and 1 thigh, which was plenty for the two of us for dinner.    The chicken is seasoned with turmeric, salt, pepper and a little olive oil, and then white wine vinegar is added to the baking dish and then roasted.

For side dishes, I knew I wanted something that would work well with that vinaigrette - something that would absorb it, be dressed by it, be complimented by it.   I decided to roast a pan of brussels sprouts, carrots, and shallots in the oven that roasted while the chicken was in the oven.   I also made some quick cook faro for a grain base.

While the chicken is roasting, you make a simple herb salad with crushed olives, olive oil, garlic, and fresh parsley.  I also had some fresh dill, so I added that as well.  

The idea is that you are basically making a vinaigrette by adding this fresh olive/herb mix to the vinegar roasted chicken.

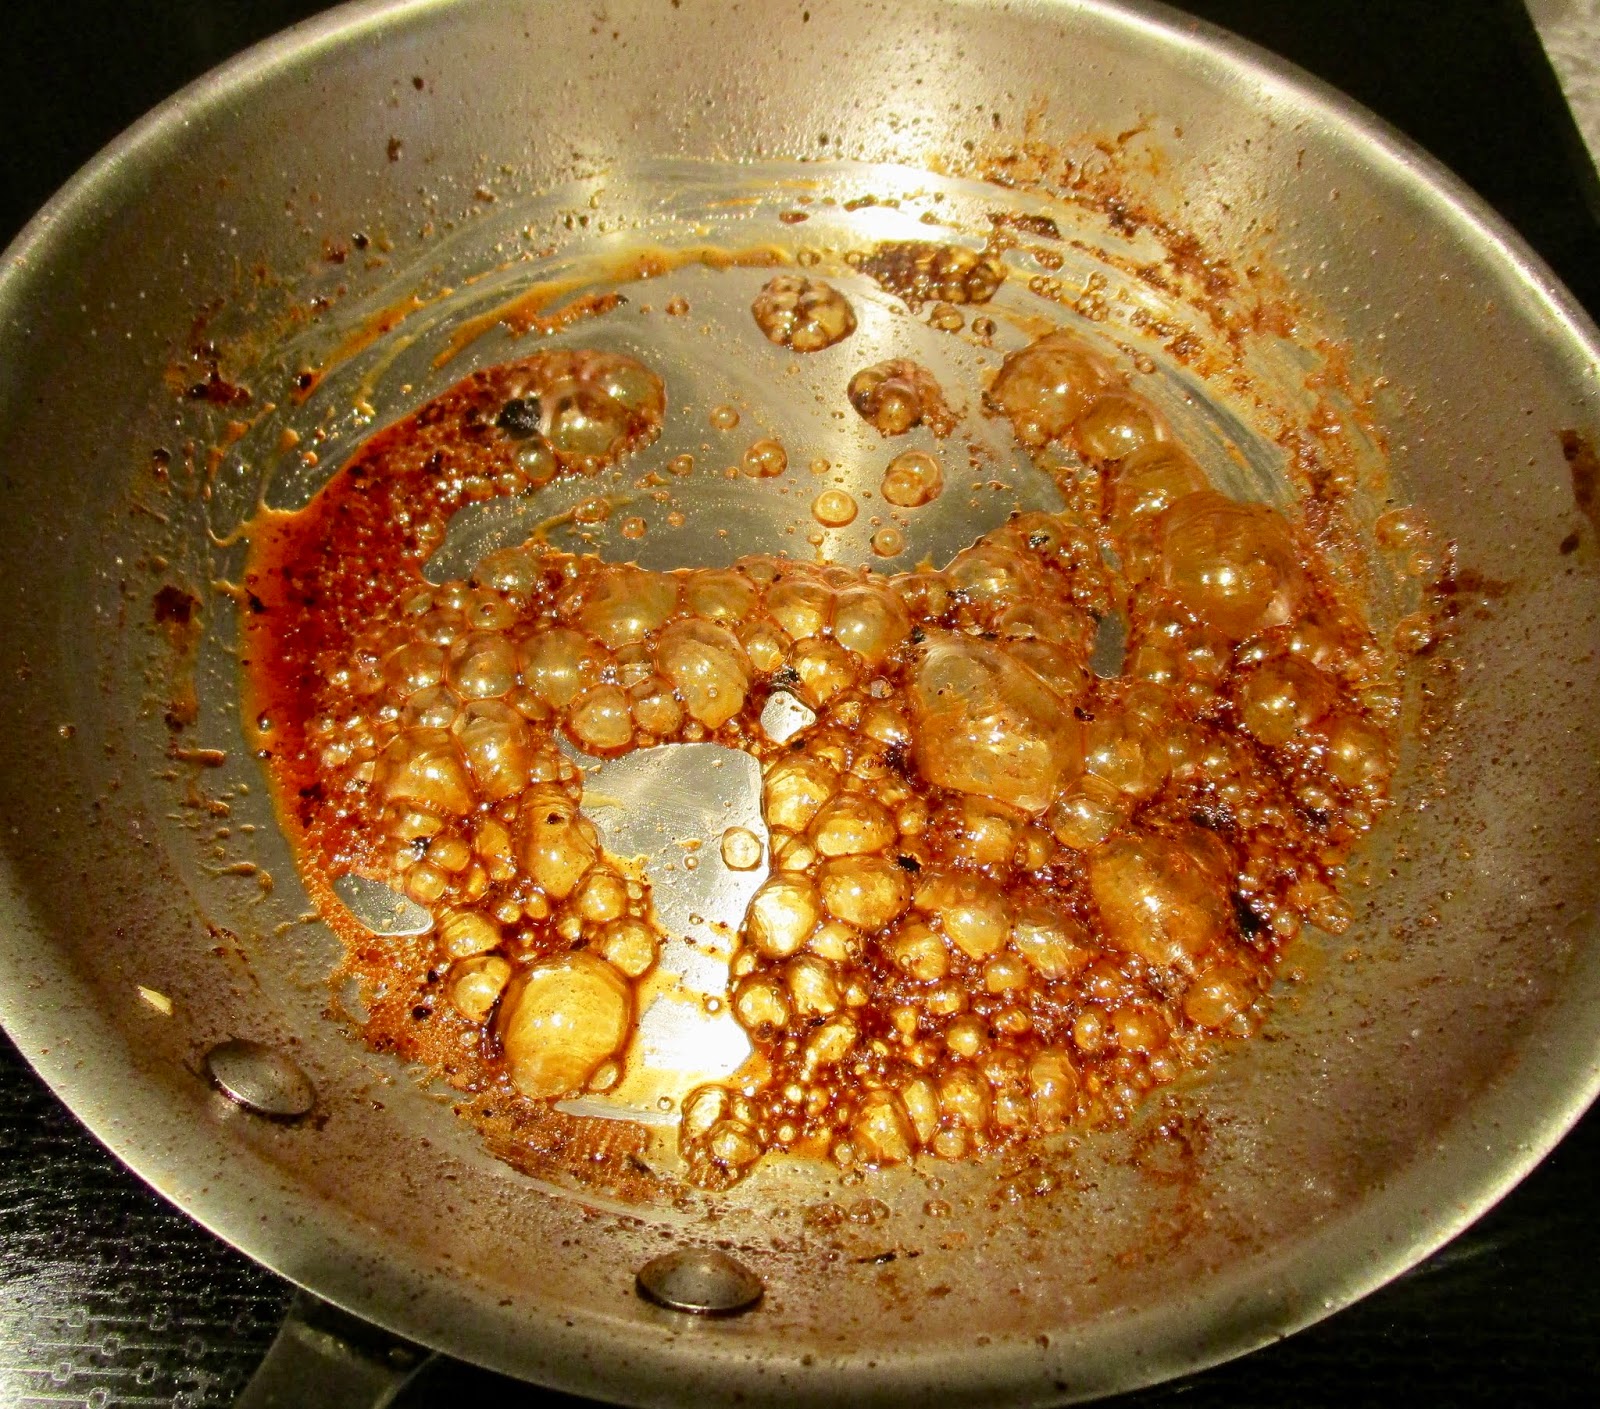
The chicken came out a rather brilliant shade of yellow, courtesy of the turmeric.   The vinegar had just about completely reduced down to nothing and there was a lot of glorious fond on the bottom of the pan.    I wanted to make sure I got all that up, so I took the chicken out of the pan and added a couple extra tablespoons of white wine vinegar to the pan to deglaze the roasting pan.

At that point, you add the olive/herb/garlic mix to the pan and to make the pan sauce/vinaigrette that you pour over the chicken.   The pan had the chicken fat/juices and olive oil, then there was also more olive oil in the olive/herb mix.    I had already added extra vinegar to the pan to deglaze and found that the pan sauce needed quite a bit more vinegar to cut through all the richness of the fats already in the pan.   I ended up adding close to another half a cup of vinegar to get a good bite to it.   I thought the salt level was fine but added a couple solid grinds of black pepper.

So, how was it?


This was a really good, solid weeknight dinner.   It took a grand total of about 45 minutes start to plate.    I didn't feel that the turmeric brought much to the chicken other than color.    I did enjoy the Castelvetrano olives more than I normally like green olives, but I'd really like to go back and try this with some of my favorite black olives (or use some Trader Joe's Olive Tapenade, which was my back up plan if I couldn't find the Castelvetranos).    I'd also like to try this in warmer weather served over hearty salad with spinach and arugula.    

When you look at the similarities between the NY Times recipe and the Dining In version, you can see that there's a lot of options to play around with this basic method, and that's always a win.

Overall Rating:  8  out of 10.    Easy weeknight option with a lot of room to play around.   Very flavorful and moist.

Ease of Preparation:   9 out of 10.    Simple, easily sourced ingredients that would be easy to swap out depending on what's available in the pantry.    Can't skip the fresh herbs, but could easily change up the mix used.

Will It Freezer Meal?   No.  There's really not much to prep ahead with this recipe and much of the recipe's success relies on that fresh vinaigrette and herb finish.


As a bonus, I also decided to make Roman's Salted Butter and Chocolate Chunk Shortbread (also here), which became a wildly popular cookie recipe when Dining In came out.  


These were excellent - crisp and sweet and salty.  I used my favorite blend of Trader Joe's semi-sweet chocolate and 72% chocolate, chopped by hand from their Pounder Plus bars.  

I'll respectfully disagree with Roman's view of chocolate chip cookies (but then...mine also feature chocolate chunks and are sprinkled with coarse salt), but these cookies are an excellent version of shortbread.   No reason not to have both in your life.  I'm going to have to try making them with browned butter (also something I do for my chocolate chip cookies).

Overall Rating:  9 out of 10.    

Ease of Preparation:   7 out of 10.   They're a fairly standard shortbread method.  I'm not a fan of doing roll and slice cookies, but I think it's the right method for these particular cookies.

Will It Freezer Meal?   Absolutely.  Any butter based cookie dough freezes wonderfully - I made a double batch of the dough and froze 2/3.    Shape and cut your cookies but instead of baking them, put them on a sheet pan and freeze.   Bag up frozen cookies and bake from frozen when you want them, adding an extra 2-3 minutes to baking time.

Thursday, January 30, 2020

2020 Chicken Challenge: Favorites - Grilled Chicken for the Freezer


If you have grilled chicken on hand - you have quite a few options for a quick, easy dinner.    Some of our favorites are using it as a topping for a big salad, making a pasta with it, topping grilled chicken with some marinara and cheese for a quick chicken parm, sautéing peppers and onions and making fajitas....or even just as a sandwich.

For many years, I would portion chicken cutlets into freezer bags, add some marinade and then freeze, so it was easy to thaw out and grill as it was already seasoned.   While that's a time saver, you still have to thaw and grill the chicken at some point, in addition to making whatever else you're going to make with it.

I then started to experiment with grilling the chicken first and then freezing it, so it was ready to just thaw and use.   I'm very happy with the results - while it's not quite as excellent as when it comes fresh off the grill, the frozen then thawed grilled chicken is still a worthy option, particularly when factoring in  the convenience.  

I'm partial to using Grill Mates marinade packs for grilled chicken - they have a lot of good varieties, and it's an easy quick option.    I like Garlic Herb marinade for a general, all purpose grilled chicken to have on hand - it's the most versatile seasoning.     I also did some with the Smokey Ranchero marinade, which is a new one for me - I usually use the Mesquite marinade and use that chicken for burrito bowls and fajitas, but thought I'd try the other.

The method is simple - trim down into cutlets (I used chicken breasts because they were on sale, but I also really like using boneless chicken thigh cutlets), bag them up with the marinade and let hang out overnight.     Throw them on a hot grill the next day until cooked through, then let cool completely.

I prefer to slice the grilled chicken to make it easier to portion evenly, but you can obviously just freeze the whole pieces.    As always, I prefer to vac seal the portions with the date and type written on the bag, then off to the freezer to use for quick, easy dinners.


Sunday, January 26, 2020

Week 4 of the 2020 Chicken Challenge: Chicken Wild Rice Soup in an Instant Pot


Base recipe here from HappyMoneySaver.    I made a few changes.


We left off last week with a roasted chicken.   In our family of 2, a roasted chicken means there are leftovers.    


So - I had a few things that I wanted to use up:   the remains of said chicken (a thigh, a breast, possibly the carcass), the pan drippings from that roast, and about 4 cups of rich chicken stock in 2 frozen blocks that was leftover from the last couple times I made Instant Pot shredded chicken (here's how) and had frozen.


I had seen this particular soup recipe on my go-to site for freezer meal info and recipes, HappyMoneySaver.  It looked really great, so I decided to work with that.  I tweaked the recipe here and there, because that’s just what I do.   I opted to drop the chick peas and add some extra veggies instead, as well as change a few steps around.

One of the features I love about Instant Pots is the sauté function.     I started off the soup by sautéing the onions, carrots, celery, and garlic in a little of the leftover chicken fat that I’d saved from the roast.   

I didn’t have poultry seasoning or celery salt, so I substituted ½ teaspoon each dried thyme, rosemary and sage (which is essentially….poultry seasoning).   I already opted to add celery to the carrots and onions, and I also added most of the celery leaves on the bunch that I had.

Since my chicken was already cooked, I decided not to add it before running the pressure cook cycle on the IP.   I also skipped adding the extra salt because I felt that the drippings from the roast chicken were quite salty.   I wanted to wait and see what it might need later rather than risk over salting the soup.

I microwaved one of the frozen blocks of chicken stock to thaw out about a cup of liquid - I used that to deglaze the bottom of the pan, scraping up the bits from the bottom.   I added the rest of the frozen chicken stock, the rinsed wild rice, and the pan drippings from the roasted chicken.    Put the lid on, set the pressure cooker setting to 30 minutes, and let it do it's thing.

Meanwhile, I picked all the remaining chicken off the bones and chopped it into smaller bite size pieces.   You'll  notice that a lot of the chicken looks pinkish in the pictures;  it is fully cooked.   This is not uncommon when you freeze raw bone in chicken and then thaw and cook it.   Some of that is pigment from the marrow of the bones, some of that is based on what feed the chicken was raised on, and some of that is due to hemoglobin in the muscles of the meat (particularly in legs/thighs).  

Because I already had the stock and the drippings in the soup, I decided to not use the carcass bones this time around.  Those went into the freezer for another time.   

I wanted to add mushrooms to the soup, so I used a half pound each of white button and cremini mushrooms, sliced thin.   I prefer mushrooms sautéed, so instead of adding them to cook in the IP, I decided to sauté them in the remaining chicken fat and then add them when I added the chicken meat.

Once the pressure cook cycle was done on the IP, I let it sit for about 15 minutes and then released the pressure valve.    I have to say - the soup smelled SO good when I took the lid off.   I mixed in the chicken and mushrooms to the rice/stock/veg. 

I knew that the recipe was going to make more soup than I felt we'd eat - my plan was to have some for dinner and then have some leftover for lunch in a day or two.   

I ladled off about a third of the soup base into a freezer container at this point.    Look how gorgeous that is!   That went into the fridge to cool completely, and then into the freezer.    Yes, I know the stock I used was previously frozen.   I won't let this hang out in the freezer for too long because of that.    There's enough there for a dinner one night or a hearty lunch in the next couple weeks.


I turned the IP on saute on the low temp to keep the soup base warm while I finished it.   On the stovetop, I made a roux with butter and flour, then whisked in milk (and possibly some cream...) until thickened.      Added the creamy blend to the IP and stirred well to combine.    (When I finish off the portion I froze, I'll need to make the roux-milk base again).

I took a couple handfuls of fresh baby spinach, rough chopped it, and added to the soup.    I tasted the soup and the salt level was fine  - I added about a teaspoon of fresh ground pepper.  That sounds like a lot but there was 4 generous servings left and I love pepper.

I served the soup with a simple salad and some crusty rolls.   

So...how was it?

In all honesty, this is possibly the best soup I have ever made.    

In a way, it was a perfect storm of having rich chicken stock, roast chicken drippings, leftover chicken on hand to use in this.  The soup was rich with chicken flavor...the wild rice gave the whole soup a unique nuttiness as well as providing a chewy texture that contrasted with the tender chicken, the mushrooms and reserved drippings made the soup wonderfully savory, and the creamy broth pulled it all together.


Overall Rating:  9.5 out of 10.   Fantastic.

Ease of Preparation:   4 out of 10.    When I make this again, I'm going to have to replicate the enriched chicken stock and pan drippings that I used because I feel they were essential in what kicked this soup so over the top in flavor.   While not hard per se, it adds additional steps (and time) to making this.    Worth it.   

Will It Freezer Meal?   Absolutely.  It can be done as a crock pot/instant pot dump and go meal as outlined in the original recipe, or it can be done as I opted to - after cooking the rice/veggies/etc, some of that soup base can be put aside and frozen.    

Cream based soups don't always freeze great, so it's iffy how well it would freeze after the roux/milk is added.   I've had some success with freezing cream soups, but also some issues with it.    

Coming up:   The #1 most popular recipe of 2019 from NY Times Cooking just happens to be chicken...so of course I'm making it.

Sunday, January 19, 2020

Week 3 of the 2020 Chicken Challenge: Buttermilk Marinated Roast Chicken


Recipe from Samin Nosrat’s “Salt Fat Acid Heat”.          Recipe also available here.


Just look at that bird!

Salt Fat Acid Heat is so much more than a cookbook – it’s a thesis on how these elements work in cooking chemically, how to use them with balance, how these elements play with each other.   It's a book to sit down and read and digest, before you ever get to the recipes.   It's truly an education.

The buttermilk marinated roast chicken is the one recipe this book seems to be known for…..and I had not yet tried it.    So that is this week’s project.

My bird was about 5 lbs - plenty for dinner for the two of us, plus I wanted some leftover cooked chicken for another recipe.    The recipe called for using a 3 ½ to 4 lb chicken, which is typical of a lot of whole chicken recipes – for example, Ina Garten’s million or so whole roasted bird recipes call for that size.

The problem is that most of us who shop at regular grocery stores can’t find whole chickens in that size range.    Most often the available birds are in the 5-7 lb range, which requires tweaking of the recipe – certainly increasing marinades/seasonings/stuffings/cooking time as needed.     It just amuses me that the 3-4 lb chicken is such a prevalent size in whole chicken recipes, yet such a hard size to actually find in the average supermarket.    While I may occasionally go to an Amish market or a butcher to get a high end organic chicken which are far more likely to be these elusive petite birds – that’s a splurge for me.   Like most people, I’m buying most of my meat at an average grocery store.    Ok.  Rant over.   Moving on.

I picked up the chicken about a week or so before I made this because whole birds were on sale – this means I was going to need to freeze it .  I opted to clean the chicken up first, so trimmed extra fat off, took out the innards and decided to spatchcock it.    Cutting out the back and butterflying open the bird makes for a faster, more even roast, and I also felt that it would likely thaw out a bit faster as well.   And I get to use the term spatchcock, which I like to do whenever possible.

Day 1:   Brining.

I thawed the chicken out overnight in the fridge.   The next day, I salted it well, let sit on the counter for a while, then debated about how much to increase the buttermilk-salt brine to accommodate the larger size.    While I’m all about using a proper amount of salt, I decided to just go with the recipe’s amount of salt (I use Diamond Crystal Kosher Salt – here’s why), and increased the buttermilk by ½ a cup.    I felt that it was enough salt for our tastes.
 
The chicken was bagged up, brined, and went back into the fridge for 24 hours.    I gave the bag a shake and flipped it over a couple times during that time period.    The recipe says to put the chicken on a plate, and honestly - this small bird is still too large for that.  I used a standard 9x13 baking dish to make sure there was not leaking issues.

Day 2:    Roasting.

The recipe has you shifting the chicken around in the oven quite a bit while roasting because most ovens cook unevenly.   I skipped that and used the convection setting on my oven, but I did point the legs to the back, because even with a convection fan, my oven tends to run hotter in the back.    I opted to use an enameled cast iron baking dish, a recent purchase that is fast becoming my favorite roasting pan.  (It's a Crofton, if you're interested.   It's about 8 x 12 inches in size.)

Followed the roasting directions otherwise for the recipe.   Given that my chicken was a bit larger than the near-budgie-sized bird the recipes called for, it took a few minutes longer to roast.   

You could really smell the buttermilk while the chicken was roasting - tangy, slightly sour, very aromatic.

The resulting bird was gorgeous, with the sugars in the buttermilk caramelizing until the chicken skin was an other-worldly mahogany.    I mean really - just look how gorgeous this is.   I have never had a chicken that browned like that.


Me being me, after the chicken was out of the oven and rested a few minutes, I snacked on the wings.   Yum - so moist and tender.   The pan juices were amazing as well - you do NOT want to waste them.

Although I'm a dedicated dark meat gal, whenever I roast a chicken a new way, I always cut myself a breast portion.    I *know* that the thighs and legs are going to be tender and juicy and delicious on a roast chicken, no matter how it's prepared.    The breast meat will really tell me what I want to know - are they flavorful and moist as well?   

It was.   Although there's a lot of salt in the recipe, only the snacked wings had a pronounced salty taste.  The tang of the buttermilk is very subtle to almost nonexistent in the resulting roast chicken - but the meat was very flavorful.    I let a piece of the chicken breast I'd cut myself cool off, and it was still moist - I find that sometimes the breast meat will be moist while warm but as it cools off, becomes noticeably drier.   This did not, which is a sign of a good roast.   

The bottom line?  This is a roasted chicken that I was happy to eat.


Keeping things simple, I just put some potatoes in to bake in the oven along with the chicken and steamed some fresh asparagus and made a simple salad.

We only ate about half of the chicken for dinner  - normally, we're pretty happy to just have leftovers the next night.   I have plans for the leftover meat and yes, I sure did save all those gorgeous pan juices as well.   

Overall Rating:  9 out of 10.   This was a delicious roast chicken, and is giving my standard Thomas Keller chicken a run for it's money.    I would love to make this again and then make a gravy out of those pan juices.   

Ease of Preparation:   7 out of 10.   Although relatively simple to make, you do need to plan ahead to give it a full day's brine.    

Will It Freezer Meal?   If you have extra meat & pan juices, you could freeze the leftovers.   I did freeze the bones for future stock.   Buttermilk is something that you can freeze, so in theory, you could freeze the chicken in the marinade - I may experiment with this if I have some leftover buttermilk another time.


Coming up for Week 4:   Quite possibly the best soup I have ever made.

Wednesday, January 15, 2020

2020 Chicken Challenge: Favorites - Freezer Chicken Cordon Bleu


Chicken Cordon Bleu

I'm going to do an occasional post under the "Favorites" category to go along with this challenge.   These are some of my tried and true chicken recipes that I make over and over again.

So.    I love to cook.....except when I don't.

Hence my obsession with making freezer meals.   For the last year and a half, I've been experimenting quite a bit with them, and they've really become our standard of eating on most weeknights.   The concept is simple - do some level of prep (sometimes as simple as just portioning and seasoning, other recipes you cook all the way through) in multiple portions, then freeze, so that you have dinner started another night.

I realized I could make and freeze chicken cordon bleu when I saw this recipe on HappyMoneySaver, which is my go-to website for all things freezer meal related - sooo much wonderful information and recipes.   I also have her book, "Seriously Good Freezer Meals", which has been invaluable in learning how to make freezer meals.    I did change up the recipe, as I tend to do, to suit my own tastes.

Chicken cordon bleu, with it's delicious ham and cheese filling, freezes beautifully, as well as being easy to prepare in bulk (bulk being relative - we are a family of 2).    I thaw them overnight in the fridge and simply bake for dinner.  (Spoiler alert - I use the same base recipe but change it up to make a variety of stuffed chicken options - you'll be seeing others in the future)

I typically use boneless skinless chicken thighs as cutlets because we prefer moist, flavorful dark meat chicken - they are also better sized for one serving than most chicken breasts anymore.     I use poultry shears to trim the excess fat off the thighs, then spread the thigh out in between parchment paper and whack it a few times with a meat mallet to thin out the cutlet.    Yes, you can trim down chicken breasts and use those as well for this recipe if you prefer.


Makes 8.    

8 boneless skinless chicken thighs, trimmed of excess fat and pounded out into cutlets (or chicken breast cutlets if you prefer). 

For the filling:

8 slices deli ham (look for larger slices)
1 egg, beaten
4 ounces cream cheese, softened
8 ounces shredded gruyere and swiss cheese (I use a pre-shredded bag from Aldi)
2 teaspoons grainy Dijon mustard 
Salt and pepper to taste

For breading:

½ cup all purpose flour, mixed with 1 teaspoon salt and ½ teaspoon pepper
1 ½ cups seasoned dry breadcrumbs  (Panko or regular)
2 eggs beaten with 2 Tablespoons water

Mix together the cream cheese, shredded cheeses, and Dijon mustard until well blended – taste and season with salt and pepper as needed.   Blend in the beaten egg.

Lay out a slice of ham and form 1/6th of the filling into a log on top of the slice, then roll up.   Wrap the cheese filled ham with a thigh cutlet.   Repeat.   You know the drill.

If I have time, I prefer to par-freeze the chicken at this point for about an hour on a sheet pan so it holds together a little better for breading.   Sometimes that happens...sometimes not.

Dredge the stuffed chicken in the seasoned flour, then dip in the egg wash.   Roll in the breadcrumbs.      

Set the breaded chicken  - seam side down - on a sheet pan either lined with parchment or foil and spritzed with cooking spray.

To make as a freezer meal:    Put the whole sheet pan in the freezer for 3-4 hours, until the chicken is firm.   Bag up what you need for 1 meal into either a freezer bag, squeezing as much air out as possible, or into a vac seal bag (my preference).    Make sure to date and label your bags - it's also helpful to write the finishing instructions on the bag.

Thaw overnight in the fridge before cooking.

To cook:   Preheat oven to 400F.    Spray the pan with cooking spray.   Drizzle each stuffed chicken with a little olive oil.   Bake 40-50 minutes until the chicken is cooked through, and serve.

It's inevitable that some of the filling will sploodge out of the chicken, but the egg in the filling holds it together to some extent.   


Overall Rating:  9 out of 10.   These are sooo tasty - I love the blend of melty cheeses, the ham, the hint of dijon, the juicy chicken.    These are always a treat to have on a weeknight because they certainly don't taste like they were "simple" or "quick".

Ease of Preparation:   7 out of 10.    Prep takes a little time - trimming the chicken, making the filling, assembling.   Doing a breading set up is always a bit messy to clean up.    On the plus side, it's not a whole lot of extra work to make more of these for another time.    These make for an exceptionally easy dinner when used as a freezer meal - just thaw and bake.

Will It Freezer Meal?   ABSOLUTELY.   These are among my favorite things to make into freezer meals and I almost always have some on hand.   I make a variety of stuffed chicken as freezer meals and will share some other recipes in the future.

Saturday, January 11, 2020

Week 2 of the 2020 Chicken Challenge: Vietnamese Caramelized Ginger Chicken


Recipe adapted from A Bird in the Hand by Diana Henry.

If there’s one cookbook I can blame for kicking off previous chicken challenges, Diana Henry’s A Bird In The Hand is it.    It’s a glorious cookbook –one of my most used.    Diana shares my love of dark meat chicken, and pays full homage to it here.    There are whole bird and chicken breast recipes in here, but mostly it’s all about the thighs and drums.

This is also the cookbook that I asked for and received from the husband for Christmas 2015 that escalated his teasing about me cooking chicken all the time and causing me to kick off the first "Month of Chicken".  

(For the record....yes, I cook things other than chicken.   But like normal people, chicken is on the menu 2-3 times a week.)

I had to go digging a bit through this book to find a recipe I haven’t made before (there’s not a lot left), but settled on the Vietnamese Caramelized Ginger Chicken.    

Serves 2.

I mixed together in a glass dish:

3 bone in, skin on chicken thighs, trimmed
1 teaspoon sugar
2 Tablespoons fish sauce
2 Tablespoons grated ginger
6 garlic cloves, smashed
1 red fresno chili (or similar) sliced, seeds removed (leave the seeds if you like spicier)


I covered this and chilled overnight in the fridge, occasionally giving the thighs a shake and a turn to redistribute the seasonings.  

A note on prepping the chicken thighs.....I like to trim off excess fat and skin to neaten them up and so there's not as much rendered fat.   I use poultry shears for this - I have a good set from Wusthoff and they are one of my most used pieces.   This particular recipe asked that I cut the thighs in half through the bone.   I'm not really sure what the purpose of cutting the thighs in half would be ~ regardless, I don't have a meat cleaver (surprisingly) so I opted to leave the thighs whole.

Fish sauce is basically liquid anchovy – it won’t taste fishy, but it gives a deep savoriness to the dish.   When I took the lid off after the 24 hour marinade, the aroma was amazing.

Just as an FYI – fresh red fresno chilis are hotter than a jalapeno but have a nice sweetness to them.   However, when you cook  – as you will in the sauce – the heat seems to mellow down to more manageable levels, which makes a red fresno my hot pepper of choice in a dish like this.

For the sauce, you’ll need:

A little oil
1 small onion, cut in half and sliced thin
1 cup of chicken stock
Zest of 1 lime (reserve rest of lime to finish)
Reserved marinade (including garlic/peppers/etc)
1 Tablespoon sugar

When ready to cook the next day, I scraped all the garlic/peppers/etc off the chicken but saved them and the marinade, as they’ll be part of the sauce.

I heated a skillet large enough to hold all 3 thighs to medium high with a little oil and put them skin side down to brown for a few minutes.    Because there’s a liquid marinade, the skin isn’t really going to get crispy, but that’ll be fine.    After a few minutes, I flipped them over and browned the other side of them as well.    Once both sides were browned, I removed the thighs from the pan to a plate and used a paper towel to blot up some but not all of the fat out of the pan.   

I added the sliced onion to the pan and sautéed just for about 2 minutes, using a wooden spoon to scrape up some of the bits from the bottom of the pan, then added the onions to the chicken thighs on the side.

So here’s the fun part….the caramel component of the “caramel ginger chicken”.     I added 2 tablespoons of water to the pan and 1 tablespoon of sugar.    The water deglazed the pan so the liquid immediately turned brown – and mostly evaporated because the pan was fairly hot.    The problem with this is that because you now have a reduced brown liquid in the pan, you’ve removed the usual visual clues of caramelizing sugar.     I just stirred the pan and kept sniffing for the whiff of burnt caramel you get when the caramel is just about to burn past redemption.   (Yeah…how’s that for helpful how to cook this info?)    It was a small amount of sugar and a hot pan and it didn’t take more than 2 minutes.


As soon as I got that slightly burned odor, added the chicken stock, and my caramel immediately hardened, which was very gratifying – if I hadn’t cooked it long enough, it wouldn’t really have done that.    

I brought that back to a boil, stirring to break up the caramel and melt it into the chicken broth.   Added the reserved marinade, the onion, the lime zest, and the chicken – skin side up – back into the pan and turned down the heat to just under medium.   

According to the recipe, you just finish it off on top of the stove by simmering it uncovered.    I wasn’t overly happy with the color on my chicken skin and I wanted the sauce to cook down more, so I opted to crank up my oven to 425F and put the whole skillet in the oven to finish off for about 20 minutes.    

That was absolutely the right thing to do  - the skin browned up beautifully and the sauce reduced to a lovely thick, jammy consistency.


To finish:

Juice of 1 lime
2 scallions, sliced thin
¼ cup chopped fresh cilantro

Once I pulled the skillet out of the oven, I squeezed the lime over the chicken and sprinkled on the cilantro and scallions.

I served the chicken with steamed jasmine rice and fresh broccoli.


Overall Rating:  7 of 10.    This was a tasty dish with nice complexity.   The lime juice, cilantro and scallions gave the dish a fresh pop of flavor and the fish sauce and caramel added to the depth of the sauce.    The pepper mellowed after cooking in the sauce but left a distinct undertone of heat.  While this was tasty, it's probably not something that would make it's way into regular dinner rotation.

Ease of Preparation:   5 out of 10.   Requires advance planning as chicken is best marinated overnight.   Requires some harder to find ingredients, and leaves some leftover fresh ingredients that you’ll want to plan to use before they go off.     If inexperienced caramelizing sugar, may have difficulty with that step.

Will It Freezer Meal?    Probably not as is.   Could possibly make it with skinless thighs up to finishing the sauce and then freeze, adding fresh cilantro/scallions/lime once thawed and reheated.

Wednesday, January 08, 2020

2020 Chicken Challenge: Technique: Using your pressure cooker to make shredded chicken


About once a week, I plan on doing a “bonus” post - sometimes it’ll be about a technique, other times I’ll be sharing a favorite chicken recipe….and we’ll see what else shows up.   

I really consider this more of a technique rather than a recipe, because I’m not going to tell you what to do with your shredded chicken.   There are lots of recipes out there for cooked chicken though, and this is an easy way to make tender, moist cooked chicken that shreds easily.    You could also dice it if that’s what you need for your recipe.


I am not an electric pressure cooker guru.   Let’s get that out of the way.   We’re not huge on soups & stews, and I prefer not to boil everything (which is essentially what a pressure cooker does).   But that said – I do find my Instant Pot (the brand of pressure cooker that I have) to be a useful tool in the kitchen.  

To make shredded chicken:

Add to your pressure cooker:

·      3-4 lbs of boneless skinless chicken breast or thighs.  If using thighs, you may want to trim some of the excess fat off of them.

·      2 cups of chicken stock.    You can use a boxed or canned stock that you like, or you can use bullion and hot water (just mix together well to dissolve the bullion).   If using low salt chicken stock, you may want to add a teaspoon or so of salt to the chicken and toss to season it.     

Close up your pressure cooker and set to pressure cook for 10 minutes.    Once the time is done, let the pressure cooker come to a natural release, i.e. when the pin drops on it’s own – that will probably take another 10-15 minutes.     You don’t have to baby sit it – if you are doing something else and let it sit a little longer, it’s not a big deal.

At this point, you now have two products:  tender cooked chicken, AND a rich chicken stock.     Pull out the pieces of chicken – they’re going to probably pull apart as you try to do that, they’ll be that tender.   You may want to strain the stock to get all the small pieces of chicken that have broken off.

The leftover chicken stock is liquid gold and you want to save that.   I typically freeze it – either in an ice cube tray or in a 1 cup block, so it’s ready for me when I want it.   

Shredding the chicken is easy – for big pieces, you can just get in there with 2 forks and pull the meat apart (or your hands…), or you can dice it.   If you want a medium to fine shred, the easiest way is to put it in your stand mixer, or into a deep bowl and use your hand mixer.  Just pulse briefly for a medium shred, or a few times more for a fine shred.    Do NOT try to use the mixer method with a shallow bowl, unless you enjoy cleaning flying chicken carnage up from your kitchen for the next week.  (Ask me how I know….)

You can and should make more shredded chicken than you immediately need – it freezes easily and then you have it ready to go when you need it.   I would recommend when freezing cooked chicken to add a couple tablespoons of the cooking liquid to the chicken to keep it moist.    Freeze it as airtight as possible in a freezer bag or vac seal, and it’s good to go.