~


Tuesday, February 25, 2020

Week 8 of the 2020 Chicken Challenge: Herb Butter Roasted Chicken


Running a bit late on the post this week because I haven't cooked much the last week - the hubs has a vile cold and the meds are working but not sitting well with him.   He hasn't had much of an appetite, let alone been up for anything "experimental"....yes I made homemade chicken soup, and I'll probably make another batch this week.    As I've said with all the chicken challenges, they are "real world challenges", so sometimes the real world takes priority.

I wanted to do something relatively simple for dinner that was appealing to someone with no appetite, and roast chicken is always a good option.   I already have a couple of whole roast chicken options tagged that I'll be making for this challenge, so I picked one of the more straightforward versions, the Herb Butter Chicken out of "Everyday Dorie" by Dorie Greenspan.  

I love Dorie's cookbooks and "Everyday Dorie" is no exception.    Her "Baking:  From My Home to Yours" is possibly my all time favorite baking book, with her "Dorie's Cookies" being a close second.      I had intended to also make a dessert and a side dish out of this book as well, but the hubs wasn't up for a big dinner, and I can't be trusted having an entire cake to myself.  I'll do those another time.  

I opted to try one of Aldi's "Never Any" line of whole chickens - while not specifically organic, they are antibiotic-free, free range, no salt brine added, among other things.   They also don't have the organic bird price tag.  As always - the recipe calls for a nearly impossible to find 4 lb bird, so I went with a bird that was just a little over 5 lbs.

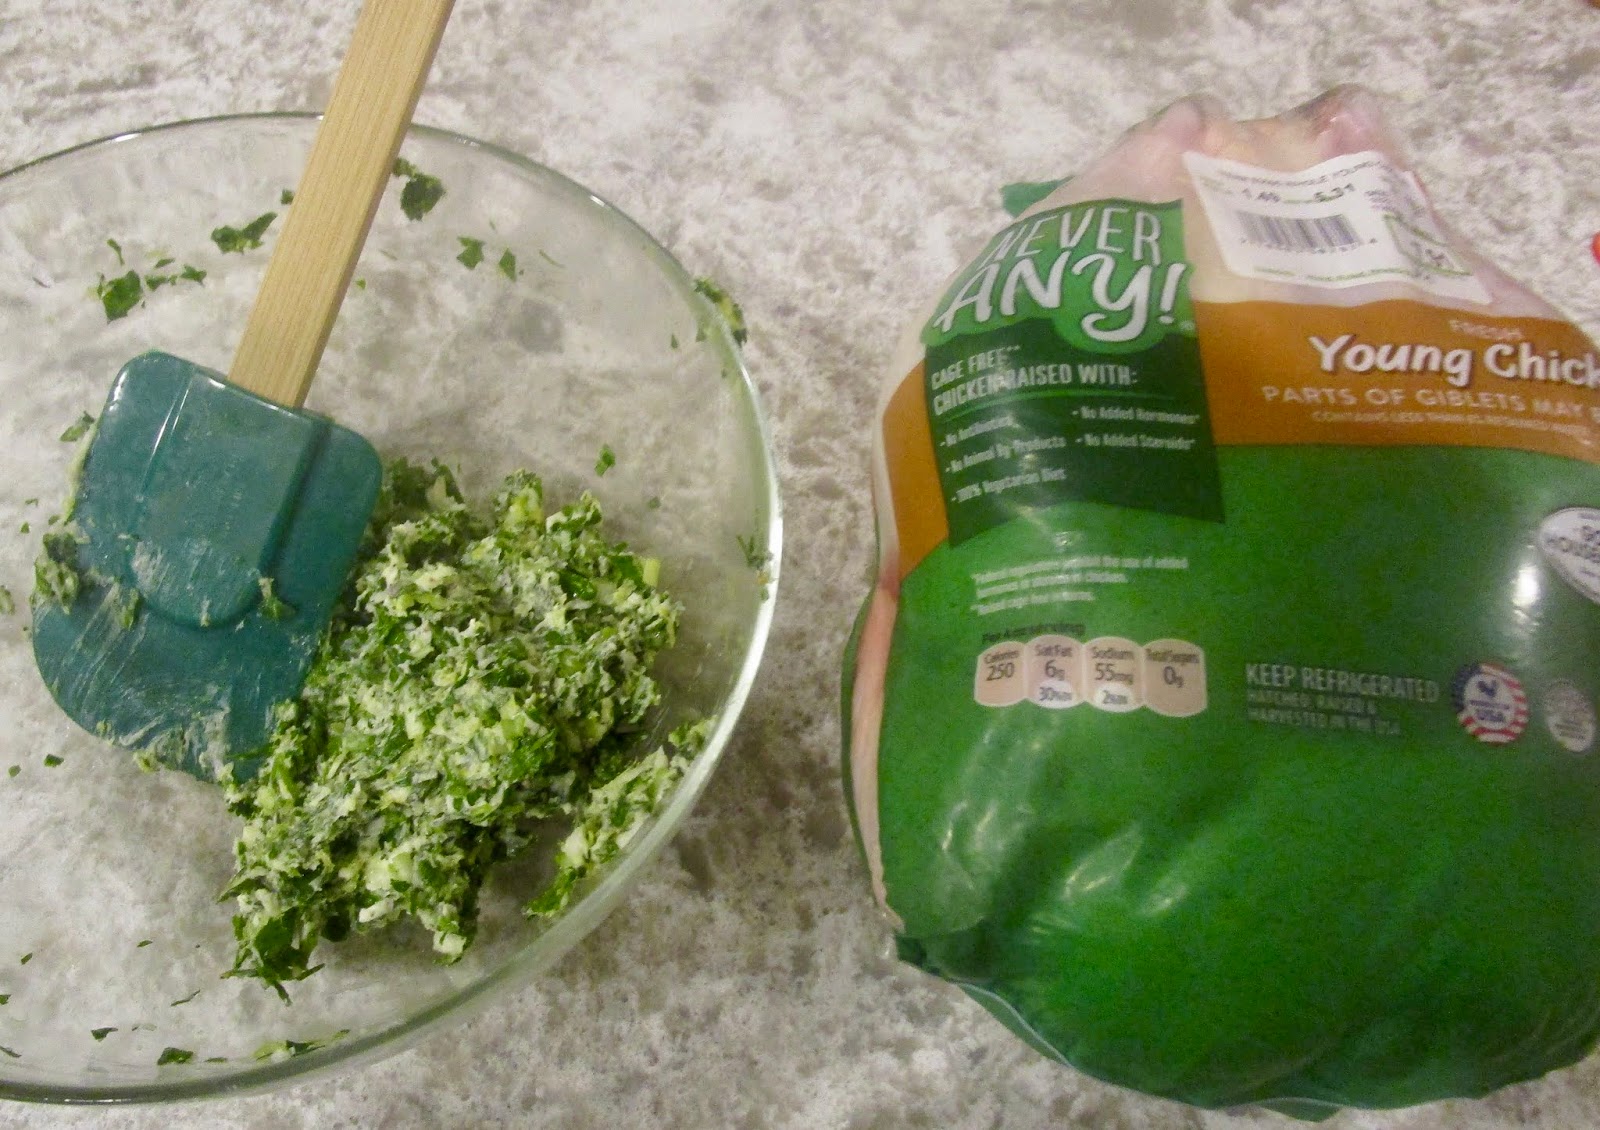
This is not a complicated recipe and includes several "tricks" I've tried before.   I started by making an herb butter with 6 tablespoons of butter, the zest of one lemon, about a half cup of minced fresh herbs, a couple minced scallions, salt, and pepper.    You really could use a lot of interesting combinations of herbs here, depending what direction you wanted to go with the flavors.    My (non Aldi) store was a little limited in selection the day I was there, but I did get some fresh thyme, sage, and parsley and used those.     Rosemary, marjoram, oregano, dill would all have been good as well.

Dorie has you roasting the chicken in a Dutch oven, so I pulled out my 5 1/2 quart Le Crueset.   More on vessel type later....given that it was a slightly larger bird than the recipe intended, I think I had better options than what I used.

You build the pot by using a couple of slices of stale-dish bread (I used some from a mini baguette that I specifically bought and then left out to dry) spread with a  little bit of the herb butter blend.   Drizzle a little oil in the bottom of the pan, add the bread, a sliced onion, and a bay leaf.

You also need some white wine for the pot.   So - just stating the obvious - I love wine.  I far prefer to drink red wine over white, so I don't always want to open a full bottle of white to use in a recipe, and then have it sit for weeks in the fridge until I finish using it up.    

And so keep these mini bottles of white wine in the pantry - they're the type you find in 4 packs at the booze store.   The bottles are about 5 to 6 ounces i.e. about the equivalent of a glass of wine.....and about what you need for most recipes.

I added one of these little bottles to the pot as well per the recipe, because wine with butter and herbs and chicken are just never a bad thing.  Usually.  More on that later too.

Then there's the chicken.    I loosened up the skin as well as I could without tearing it, and worked the herb butter in chunks under the skin, spreading it out as much as possible.    The outside of the bird got a hefty sprinkle of salt.   I cut the lemon I zested for the butter in half and stuffed that inside with the stems leftover from the herbs, plus some extra parsley and scallions.

The chicken gets added to the pot on top of the bread and onions and wine, then into the oven for about an hour at 425F on the convection setting until cooked through.   (Note:  the recipe calls for roasting it at 450F, but I dropped the temp 25 degrees to compensate for using the convection setting on my oven.

Beautiful, isn't it?    Well, sort of.   The breast browned up well but if you look, you can see the drums (and the thighs) really didn't brown well.    I did temp check them to make sure they were cooked through (they were).      It's definitely not nearly as evenly browned as the picture in the cookbook....but there you have it.


As I mentioned, the hubs hasn't had too much of an appetite, so I just made a salad with butter lettuce, cucumbers, scallions, dried cranberries and goat cheese crumbles tossed in a homemade red wine vinaigrette for a side dish. 


As always, whenever I roast a chicken, I snag the breast to eat first.  White meat is always the first to dry out and if that's good....it's a good recipe.

The chicken itself was extremely moist and delicious, as a roast chicken tends to be...really nice flavor from the herbs and butter under the skin.   I had even gotten some down into the thigh area, even though the skin didn't brown over it, the meat itself was extremely flavorful and tender.      The chicken worked really well with the sweet cranberries and butter lettuce and the vinaigrette cut some of the richness of the chicken skin.

But let's address a couple issues.    The non-browning of the legs is obviously an issue because cooked or not, they're just better with crispy skin.   I think that was a result of it being a bigger bird then called for and not getting enough exposure in a high sided dutch oven.  I think it would have worked better either in my braised (wider, low sided) or even in a baking dish.  I'm particularly fond of the enameled cast iron baking dish I've been using lately - I should have gone with that.    The lower dish would have allowed for more exposure/air circulation around the legs.....had I spatchcocked the chicken, the overall chicken would have browned more evenly.

Let's also address what's going on in the bottom of the pan, which I didn't get a picture of but should have.   I've done several recipes that use bread under a roasting chicken ~ one of Dorie's recipes from "Around My French Table" which was my first time doing it, and subsequently in other recipes like Ina's Roast Chicken and Bread Salad, which is a riff on the famous Zuni Cafe roast chicken.    You put chunks of dry crusty bread on the bottom of the pan to roast under a chicken and 2 things happen - the bread gets deep deep brown and crusty (but not hard) on the bottom and then the top (and bottom as well) soak up all the fat and juices from the roasting chicken, making the bread amazing and rich and decadent - you can't eat too much of it but soooo good.  It can be a bit soggy but not terribly so.

Because this recipe called for the addition of wine into the bottom of the pan - the bread never got that super brown bottom and it was soggy to the point of falling apart into mush.    Very disappointing - so the bread and onion mix in the bottom basically got wasted.

Overall Rating:   8 out of 10.   Despite the browning issues and the bread issues, the chicken itself was delicious, and ultimately, that's what this recipe was about.     

Ease of Preparation:   7 out of 10.   Although it takes a little time to make, it's a fairly simple, straightforward recipe to make.   

Will It Freezer Meal?   Dorie's recipe calls for you to make double the herb butter and save half for later - and yes, that herb butter will freeze just fine.   I make compound butters and freeze all the time to use up fresh herbs that may otherwise go to waste.   You could also prep the bird by stuffing the butter under the skin and then freezing it.  I would probably more likely do that with chicken legs rather than a whole chicken.   Then just thaw and pop right into the oven to roast.

Sunday, February 16, 2020

Week 7 of the 2020 Chicken Challenge: Sweet Tea Brined Fried Chicken from Outlander Kitchen


Happy Outlander Season 5 Premier Day!   Woot!

(Actually, they released the season premier early so I watched it yesterday.....really great adaption of "the longest day ever" and a wonderful kick off to the season).  


So yes...I'm an Outlander fan.   I've read all the books - multiple times (and if you're familiar with them, you know how long they are) - and love the show.     In honor of the new season of Outlander starting today, I decided to cook out of Theresa Carle-Sanders' "Outlander Kitchen" cookbook.   She also has a website, Outlander Kitchen.

There's only a grand total of four chicken recipes in the book, so I opted to try one I found most interesting, Sweet Tea Brined Fried Chicken.  (At some point, I'm totally making the mock turtle soup, but not this week...maybe I should have done that for Valentine's Day?)

The author notes that this isn't a particularly period recipe - it's more "inspired by" than "authentic".   I further tweaked it with some lemon in the brine and extra seasonings to the flour.    I had originally planned on using boneless chicken thighs but chicken tenders were on sale this week and they do make for a good frying option if you're not doing bone-in.


Serves 4

1 1/2 lbs chicken tenders, tendon trimmed out

For the brine:

3 tea bags (I used Typhoo, a strong English black tea)
1 lemon, quartered
2 springs fresh rosemary
1-2 bay leaves
10 or so peppercorns
1/2 cup sugar
2 tablespoons salt

The brining process isn't complicated but it does take a couple hours.   The original recipe doesn't call for lemon but if you have sweet tea  - you need lemon.     You add all of your brine ingredients to a heat proof container (I just used a rubbermaid style one) and then add in 2 cups of boiling water.     Stir to dissolve the salt and sugar and let the tea brew.    When you feel the tea is strong enough, add about 2 cups of ice and stir to melt, then put the brine in the fridge for half an hour or so until it cools down.

Once the brine is cool, add the chicken tenders to the mix - there should be enough of the brine to cover the chicken.    I let the chicken brine for about 4 hours total in the fridge.

I drained off the brine and just used a couple paper towels to pat the chicken tenders dry.

For the coating:

1 1/2 cups buttermilk

1 1/2 cups flour
1/3 cup cornstarch
1 teaspoon pepper
1 teaspoon salt
1 teaspoon onion powder
1 teaspoon garlic powder
1 teaspoon dried thyme
1/2 teaspoon paprika
1/2 teaspoon cayenne pepper

Vegetable oil for cooking  (usually more than you think you need)


Coating is fairly straight forward.    Add the buttermilk to a shallow baking dish and whisk in 1 teaspoon of salt and 1/2 teaspoon of pepper.    Add all the flour and the seasonings to another baking dish and whisk together.  

First go through and dredge all the tenders in the seasoned flour.   I set up a sheet pan with a baking rack in it to set them on.  (I also set up a 2nd one with paper towels in the bottom to drain the chicken as it comes out of the oil).  

After the first coating of flour was done, I did a little trick I like to do with fried chicken - I took a couple tablespoons of buttermilk and drizzled it over the flour, and used a fork to toss it in - you're not trying to make a batter, you're just trying to create some clumps in the flour.    Those clumps end up giving the finished coating of the chicken extra crispy bits when frying (which as we all know is the best part!)

The floured chicken fingers get dipped in the buttermilk and then dredged a 2nd time in the flour (with as many clumps sticking as you can get).  

For frying, I used a 4 quart pan with about 2 inches of oil in it.   I prefer to use a deep pan because it keeps the splatter to a minimum....it did mean I could only fry about 4 tenders at a time, so I ended up doing several batches.   Ah well.   I had to add some extra oil to the pan once or twice in between batches, as is normal.

It only takes a couple minutes to fry a tender, just until they are golden brown.  It's useful to use an instant read digital thermometer to make sure the oil is at 350F when the chicken goes in and that the chicken gets up to about 160F internally before pulling it out.

I drained the chicken off to one side and let it cool down a bit.

Meanwhile I made a quick dipping sauce of grainy dijon mustard and honey, as well as a simple cole slaw to go with this.  


As a bonus recipe, I also made the corn muffins out of Outlander Kitchen.  I did a half recipe and baked them in mini loaf pans - it made 4, which is plenty for us.


So, how were they?

You know.....it's fried chicken so they can't be all bad, right?   And it was indeed tasty.   I did add extra seasoning to the flour over what the recipe called for, so I did feel they were seasoned well.   But if I'm going to be nitpicky......the flavor of the tea was very subtle and I wonder if brining them overnight would help with that and let the flavor really soak in.    Once the chicken started cooling, the coating really didn't stick well to to the meat, which is annoying.    I always make extra fried chicken when I make it (because if I'm making the mess, I want 2 meals out of it) and then reheat in the oven, and again the coating didn't stick well on the chicken during reheat.

I was not a fan of the cornbread - I prefer a sweeter cornbread.  I didn't like the creamed corn that I used in it - I tried Aldi brand creamed corn, and I'm usually an Aldi fan but this was more just mashed kernels, very little creaminess to it, and it really affected the overall texture of the cornbread, so there's some user error in that.    I won't buy Aldi creamed corn again.

Just as a note  - my standard recipe for doing fried chicken tenders is a 24 hour brine in a heavily seasoned buttermilk, then straight into a heavily seasoned flour for a single dredge, then into the fryer.    There's still some issues with the coating staying on once cooled - there always is with frying skinless chicken - but not to the degree that I saw with the tea brined chicken.    The buttermilk brine is still my preferred method for tenders.   Ruhlman's fried chicken is still my gold standard for bone in fried chicken.

Overall Rating:  6 out of 10.     Tasty,  but I didn't feel the brine added a lot to the chicken, nor did the coating stick well to the chicken.   I probably wouldn't make again, as I have other recipes I prefer more.

Ease of Preparation:   4 out of 10.   These weren't particularly hard to make, clean up is always a project for deep frying - it makes a lot of dishes, plus general mess of deep frying.  Made a LOT of dirty dishes.    You do have to plan ahead because the brine takes a while to cool down and then the chicken needs a couple hours in it.

Will It Freezer Meal?      Fried chicken is never better than when it's fresh out of the oil....but you could brine and bread the chicken, flash freeze it on a sheet pan, and store it in the freezer, to be fried from frozen (will take a couple extra minutes).      

Sunday, February 09, 2020

Week 6 of the 2020 Chicken Challenge: Valentines Day Special - Cooking from Fifty Shades of Chicken


"Blushing Parts"....recipe adapted from Fifty Shades of Chicken by E. B. Fowler.


With Valentine's Day approaching, I decided to cook out of everyone's favorite bondage-and-chicken cookbook, Fifty Shades of Chicken.    I've had this book for quite a few years and have made a number of the recipes out of it.   The descriptions/stories that go with the recipes are laugh-out-loud funny in a PG-13 adult humor kind of way (and are meant to be more funny than erotic), and the recipes themselves, while not anything breakthrough or exceedingly original, are decent.

I had to do a little digging through to find a recipe I hadn't made before that looked interesting, and "Blushing Parts" (i.e., cranberry baked chicken with apple cider) was the winner.

Serves 2

2 chicken thighs and 2 chicken legs, trimmed of excess fat and seasoned with salt and pepper

1 1/2 cups apple cider
3 tablespoons apple cider vinegar
1/2 cup dried cranberries
1/2 teaspoon cinnamon
1 inch piece of fresh ginger, peeled
1 tablespoon butter, cut into 4 pieces

Set aside 1/2 cup of apple cider and 1 tablespoon of apple cider vinegar.

To get started,  I cranked the oven up to 450F.

For this recipe, it has you making a glaze that also reconstitutes the dried cranberries.  I smashed the chunk of ginger with the flat of a knife.    I put the 1 cup apple cider, 2 tablespoons apple cider vinegar, the cranberries, cinnamon and ginger into a small saucepan and brought it up to a boil.   I then lowered the temperature and let the blend simmer.   The recipe calls for you to do that for 20 minutes until the mixture is well reduced - I found it only needed about 10 minutes or so to get to the consistency shown above.    Once the glaze was done, I removed and tossed out the piece of ginger.

The chicken gets seasoned with salt and pepper and put into a roasting pan, skin side up.  I always give my pan a spritz of cooking spray just to make sure it doesn't stick.    I poured the fruit and glaze over the chicken and dotted with the butter.  

As you can see, there's really not a lot of liquid in the pan from the glaze.    

I got the chicken in the oven and set the timer - according to the recipe, it should take about 40 minutes for the chicken to roast.

I checked back after about 25 minutes, and while the chicken looked good, I really didn't feel it was "blushing" much - the glaze wasn't visible on the chicken, the cranberries were looking kind of dry, and there wasn't much liquid in the pan other than some but not a lot of the roasting juices.  

So at this point, I opted to deglaze the pan by adding extra apple cider and apple cider vinegar.  I scraped the bottom of the pan, and then basted the chicken with the pan juices, which really gave the chicken some of that blushing color....because if we're going to call it "blushing parts" well then I need a little more color on it LOL.    I let the chicken continue to roast, but went back and basted it two more times to build up the glaze those lovely legs and get some browning going on.

I could have let the pan juices reduce a little more but I felt the chicken was well cooked at that point, so I pulled it out of the oven.

For sides, I made a tri-color quinoa cooked with a little chicken stock and steamed mixed veggies.


So how was it?

I thought this chicken was good but far from great - I frequently enjoy pairing chicken and fruit, and obviously cranberry and apple both pair well with poultry.   However,  it was a little sweeter than I care for, and the ginger flavor was too subtle.   The glaze was very one note - it needed something to really balance it and add complexity.

I did enjoy the combination of apple/cranberry/chicken enough that I'll play around a little bit in the future.    If I keep the ginger/cinnamon, I'd want to add more savory Asian flavors, like temari sauce and fish sauce, with some fresh scallions to finish.    Otherwise, I'd ditch the ginger/cinnamon and swap in more aromatics - rosemary and garlic, or shallots/sage/thyme.    I would also consider swapping the apple cider for a bottle of hard cider, which would tone down some of the sweetness.

I would say that my feelings about this particular recipe really reflect my overall experience over the years of cooking from Fifty Shades of Chicken  -  I can't ignore the book because it really does make me laugh with it's tongue in cheek naughty humor.    The recipes are good but a little basic - with some tweaking, they could be much better.  

Overall Rating:  4 out of 10.   This was decent, but too sweet for my tastes.   It needed a little more savory flavors to balance the sweetness of the apple/cranberry.    

Ease of Preparation:   8 out of 10.   Easy weeknight meal.   The glaze was simple to make.    Roasting was easy but does benefit greatly from basting several times throughout the cooking process.   

Will It Freezer Meal?   The glaze should freeze just fine - make per instructions and after removing the ginger, cool and pour into a freezer bag, add the chicken.   Seal and freeze.    To cook, thaw out and add chicken to a roasting pan; roast as normal.